To fix a hole in a desk, you can use wood filler and sandpaper to fill the hole and make it smooth again. Desks are an essential piece of furniture in any home or office, providing a sturdy surface for work, study, or creative activities.
Over time, however, desks can become damaged or develop holes due to accidents, wear and tear, or aging materials. While a hole in a desk may seem like a significant problem, it is actually quite simple to fix. We will provide you with a step-by-step guide on how to fix a hole in a desk using common tools and materials.
By following these instructions, you can restore your desk to its former functionality and appearance without having to buy a new one.
Table of Contents
Assessing The Damage
When it comes to fixing a hole in a desk, the first step is to assess the damage. Understanding the extent of the hole and any additional damage is crucial in determining the best course of action. In this section, we will delve into how to determine the size and depth of the hole, inspect the surrounding areas for any additional damage, and consider the type of desk material and its structural integrity.
Determine The Size And Depth Of The Hole
To effectively repair a hole in your desk, you need to determine the size and depth. This will help you choose the appropriate materials and techniques for the repair. Start by measuring the width and length of the hole using a tape measure. Note down these measurements as they will be useful when purchasing any filler materials.
Next, gauge the depth of the hole. You can do this by inserting a small stick or screwdriver into the hole. Gently push it in and carefully observe how far it goes. This will give you an idea of how deep the hole is and whether it extends through the entire thickness of the desk material. Make a note of the depth measurement for reference later.
Inspect The Surrounding Areas For Any Additional Damage
While assessing the hole, it is essential to inspect the surrounding areas for any additional damage. Sometimes, an apparent hole may be an indication of underlying structural issues. Carefully examine the nearby edges, corners, and surfaces for cracks, chips, or any signs of weakening.
Pay close attention to the adjoining areas of the hole, as they may have experienced stress or damage as a result of the hole. Look for any signs of splintering, discoloration, or deformation. If you notice any additional damage, make a mental note of it as you will need to address these issues during the repair process.
Consider The Type Of Desk Material And Its Structural Integrity
The type of desk material plays a significant role in determining the appropriate repair method. Different desk materials have different properties and require specific techniques and materials for repair. Common desk materials include wood, laminate, metal, or a combination of these.
If your desk is made of wood, carefully examine its structural integrity. Look for any signs of rot, warping, or weakening. If the wood appears sound and sturdy, you can proceed with the repair. However, if there are significant structural issues, it may be necessary to consult a professional to assess the desk’s overall stability.
For laminate or metal desks, assess the surface condition and determine if any underlying layers are compromised. A hole in laminate or metal may require a different approach, such as filling it with epoxy or using specialized repair kits.
By assessing the type of desk material and its structural integrity, you can ensure that your repair efforts are tailored to the specific requirements of your desk.
Gathering The Necessary Tools And Materials
When it comes to repairing a hole in your desk, it’s crucial to gather all the necessary tools and materials to ensure a seamless fix. By having everything you need on hand, you’ll be able to tackle the repair efficiently and effectively. In this section, we will discuss the essential tools and materials you’ll need, as well as provide tips for selecting the right products for your desk.
List Of Required Tools For Desk Hole Repair
Before you begin the repair process, make sure you have the following tools handy:
| Tool | Description |
|---|---|
| Screwdriver | A screwdriver will be necessary for removing any screws or fasteners holding the desk together. |
| Putty knife | A putty knife is essential for applying filler or putty to the hole, ensuring a smooth finish. |
| Sandpaper | Sandpaper is required for sanding down the repaired area, creating a level surface. |
| Wood filler | To fill the hole, use a high-quality wood filler that matches the color and grain of your desk. |
| Wood glue | If necessary, wood glue can be used to reinforce the repaired area, ensuring long-lasting stability. |
| Paint or finish | If your desk requires painting or refinishing, make sure you have the appropriate paint or finish on hand. |
Essential Materials Needed For A Seamless Repair
Apart from the tools, you will also need the following materials to achieve a seamless desk repair:
- Clean cloth
- This will be useful for wiping down the repaired area, removing any dust or debris.
- Disposable gloves
- Make sure to wear gloves to protect your hands while working with chemicals or adhesives.
- Protective goggles
- Safety goggles are necessary to shield your eyes from any flying debris when sanding or applying filler.
- Paintbrush or roller
- If you need to apply paint or finish after the repair, ensure you have a suitable brush or roller.
Tips For Selecting The Right Products For Your Desk
When it comes to selecting the right products for your desk repair, there are a few key considerations to keep in mind:
- Material compatibility
- Make sure the wood filler, glue, and finish you choose are compatible with the type of wood your desk is made from.
- Color and grain matching
- Try to find wood filler that closely matches the color and grain of your desk to achieve a seamless repair.
- Drying time
- Consider the drying time of the filler and glue, ensuring you have enough time to complete the repair without rushing.
- Durability and stability
- Choose products that offer long-lasting durability and stability to ensure your desk repair withstands daily use.
By following these tips and ensuring you have all the necessary tools and materials, you’ll be well-equipped to fix any hole in your desk effectively and restore it to its former glory.
Preparing The Desk For Repair
Get your desk back in top shape with these easy steps to fix a hole. Follow our expert tips to prepare the desk for repair and restore its functionality in no time.
Clearing The Desk Surface And Removing Any Items
When it comes to fixing a hole in your desk, the first step is to clear the surface of any items that may obstruct your work area. Remove everything from the desk, including papers, pens, and any other accessories. Clearing the surface will give you a clean and unobstructed workspace to carry out the repair. Remember, a clutter-free environment helps ensure efficiency and focus while fixing the hole.
Cleaning And Sanding The Area Around The Hole
To ensure a proper repair, it is essential to clean and sand the area around the hole. This step will prepare the surface for better adhesion of the filler or primer. Begin by using a clean cloth or sponge to wipe away any dust, dirt, or debris. Once the surface is clean, grab a sanding block or sandpaper and gently sand the area surrounding the hole. Sanding will create a roughened surface, allowing the filler or primer to adhere more effectively.
Applying Any Necessary Primer Or Filler For Better Adherence
After you have cleaned and sanded the area, it’s time to apply any necessary primer or filler for better adherence. Depending on the size and depth of the hole, you may need to choose an appropriate filler or primer to ensure a seamless repair. Fillers can be used for smaller holes, while primers are more suitable for larger holes. Apply the chosen product as per the manufacturer’s instructions, making sure to spread it evenly over the repaired area. This will create a smooth and sturdy surface for the next steps of the desk repair process.
In conclusion, preparing the desk for repair is a crucial step in fixing a hole. By clearing the surface, cleaning and sanding the area, and applying any necessary primer or filler, you will set a solid foundation for a successful desk repair.
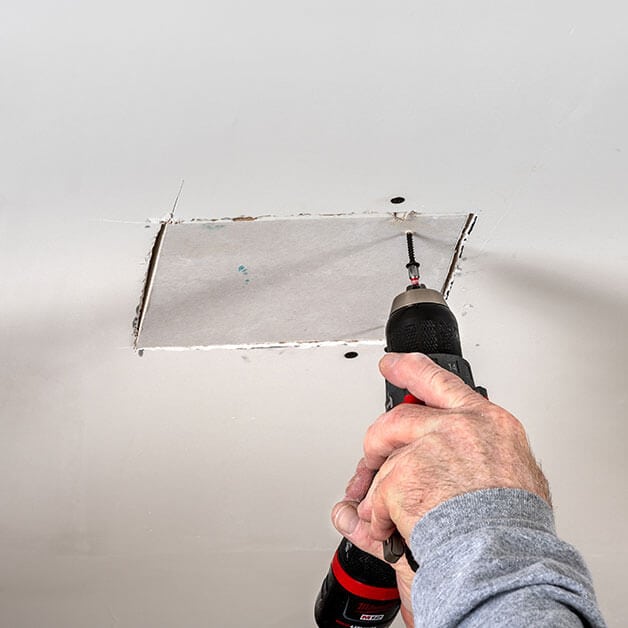
Credit: www.thepatchboys.com
Repairing Small Holes
Fixing a small hole in your desk is a simple process that can be done with a few basic tools. Start by cleaning the area around the hole, then fill it with wood filler, sand it smooth, and finish with paint or stain to match the rest of the desk.
Your desk will look good as new in no time.
Step-by-step Instructions For Repairing Small Holes
When it comes to fixing a hole in your desk, it’s important to address the issue promptly to maintain the desk’s functionality and aesthetics. Small holes in a desk may seem like a minor problem, but they can detract from the overall appearance and even compromise the structural integrity of the desk over time. Fortunately, repairing small holes is a relatively simple process that can be tackled by any DIY enthusiast. Follow these step-by-step instructions to repair small holes in your desk and restore it to its original condition.
Using Wood Filler Or Putty To Fill The Hole
The first step in repairing a small hole in your desk is to fill it with wood filler or putty. This step is crucial as it helps to restore the smooth surface of the desk and create a strong bond between the existing wood and the filler. Here’s how to do it:
- Clean the hole thoroughly: Use a clean, dry cloth to remove any dust, debris, or loose wood particles from the hole.
- Prepare the filler: Follow the manufacturer’s instructions to prepare the wood filler or putty. Ensure that you choose a color that closely matches the desk’s wood tone for a seamless repair.
- Apply the filler: Using a putty knife or a small spatula, apply the filler to the hole, ensuring that it is slightly overfilled to compensate for any shrinkage during drying.
- Smooth the surface: Use the putty knife or spatula to smooth the surface of the filler, ensuring that it blends seamlessly with the surrounding wood. Remove any excess filler.
- Allow the filler to dry: Follow the drying time specified by the manufacturer. It is essential to let the filler dry completely before moving on to the next step.
Sanding And Smoothing The Repaired Area For A Seamless Finish
Once the wood filler or putty has dried, it’s time to sand and smooth the repaired area, giving it a seamless finish. Follow these steps:
- Select the appropriate sandpaper grit: Start with a coarse grit sandpaper (around 120 grit) to remove any excess filler and rough edges. Then, switch to a finer grit sandpaper (around 220 grit) for a smoother finish.
- Sand the repaired area: Using light to medium pressure, sand the repaired area in the direction of the wood grain. Be careful not to sand too aggressively, as it may damage the surrounding wood.
- Check for smoothness: After sanding, run your hand over the repaired area to check for smoothness. If necessary, repeat the sanding process with the finer grit sandpaper until you achieve the desired result.
- Clean the surface: Use a clean, damp cloth to wipe away any sanding dust and debris from the repaired area.
By following these step-by-step instructions, you can easily repair small holes in your desk using wood filler or putty and achieve a seamless finish. Remember to take your time during each step, ensuring that the filler is applied and sanded properly. With a little effort and attention to detail, your desk will look as good as new!
Repairing Larger Holes
Learn how to repair larger holes in a desk with these simple steps. Fixing holes in furniture can be a daunting task, but with the right tools and techniques, you can restore your desk to its former glory. Whether it’s a chip, crack, or gash, this guide will help you get your desk looking brand new again in no time.
Determining The Best Approach For Larger Holes
When it comes to repairing larger holes in a desk, there are a few different approaches you can take depending on the size and severity of the damage. Determining the best approach will ensure that the repair is effective and long-lasting. Here are a few factors to consider before getting started:
Patching The Hole With A Wood Piece Or Veneer
One common method for repairing larger holes in a desk is to patch the hole with a wood piece or veneer. This technique involves cutting out a piece of wood that matches the dimensions of the hole and then attaching it to the damaged area. Here’s how you can do it:
- Measure the size of the hole to determine the dimensions of the wood piece or veneer you’ll need.
- Using a saw or a chisel, carefully cut out a piece of wood that matches the dimensions of the hole.
- Apply wood glue to the edges of the patch and insert it into the hole, making sure it fits snugly.
- Secure the patch in place using clamps or weights until the glue dries completely.
- Once the glue is dry, sand down any rough edges or excess wood, ensuring that the patch is flush with the surrounding desk surface.
- Finish the repaired area by staining or painting it to match the rest of the desk.
Blending The Patch With The Surrounding Desk Surface
Ensuring that the patch blends seamlessly with the surrounding desk surface is crucial for a successful repair. To achieve this, follow these steps:
- Start by sanding the patch and the surrounding area to create a smooth and even surface.
- Apply a layer of wood filler to any gaps or imperfections, using a putty knife to spread it evenly.
- Allow the filler to dry completely before sanding it down to achieve a smooth finish.
- Once the patch and surrounding area are smooth, apply a matching stain or paint to blend the repaired section with the rest of the desk.
By following these steps, you can effectively repair larger holes in a desk and restore its functionality and appearance. Remember to take your time, pay attention to detail, and use high-quality materials for the best results. With a little patience and effort, your desk will look as good as new in no time.
Finishing Touches And Final Steps
Once you have successfully repaired a hole in your desk, it’s time to move on to the finishing touches and final steps. This includes sanding and smoothing the entire desk surface, applying the appropriate finish or paint to match the desk, and implementing tips for maintaining and preserving the repair over time.
Sanding And Smoothing The Entire Desk Surface
Before applying the finish or paint, it’s crucial to sand and smooth the entire desk surface. This step ensures that the repaired area blends seamlessly with the rest of the desk, creating a uniform appearance. To accomplish this, follow these simple steps:
- Start by using a medium-grit sandpaper (around 120-grit) to sand the repaired hole gently. This will help level any uneven areas.
- Gradually progress to a finer-grit sandpaper (around 220-grit) to ensure a smooth finish. Sand in the direction of the wood grain to avoid creating scratches.
- Use a sanding block or your hand to maintain even pressure while sanding. This will prevent accidentally removing too much material.
- Once the entire surface feels smooth to the touch, wipe away any dust using a clean cloth or tack cloth.
Applying The Appropriate Finish Or Paint To Match The Desk
Matching the finish or paint to the existing desk is essential to achieve a seamless repair. Follow these steps to ensure a perfect match:
- If your desk has a clear finish, such as varnish or lacquer, it’s best to use a similar product. This will help maintain consistency in color and sheen.
- Apply the finish using a brush, roller, or spray, depending on the recommendation of the product manufacturer. Ensure an even application, covering both the repaired area and the surrounding surface.
- For desks with a painted finish, try to find the exact paint color used. If not available, choose a matching color and apply it using a brush or roller.
- Allow the finish or paint to dry completely according to the manufacturer’s instructions before using the desk.
Tips For Maintaining And Preserving The Repair Over Time
To ensure the longevity of your desk repair, consider implementing these tips for maintenance and preservation:
- Avoid placing heavy or sharp objects directly on the repaired area to reduce the risk of causing another hole or damage.
- Regularly clean the desk using a non-abrasive cleaner and a soft cloth. This helps prevent dirt and debris from accumulating and causing unnecessary wear.
- Consider utilizing coasters or protective pads under objects that are frequently moved on the desk surface.
- Periodically inspect the repair for any signs of damage or wear. If necessary, touch up the finish or paint to maintain its appearance.
By following these steps and implementing proper maintenance, you can effectively fix a hole in your desk and preserve the repair for years to come.
Frequently Asked Questions For How To Fix A Hole In A Desk
What Is The Best Way To Fix A Hole In A Desk?
To fix a hole in a desk, you can use wood filler or putty. Clean the area first, then fill the hole with the chosen material. Smooth it out and let it dry. Finally, sand and paint the repaired area to match the desk’s finish.
It’s a simple DIY solution.
How Do You Fill A Hole In A Wood Table?
To fill a hole in a wood table, first, clean the area around the hole. Then, apply wood filler using a putty knife. Smooth it out and let it dry. Sand the dried filler to make it even with the table surface.
Finally, finish it with stain or paint to match the table.
How To Repair A Desk Surface?
To repair a desk surface, start by cleaning the area with a mild soap and water solution. Use a scraper or sandpaper to remove any rough or damaged areas. Apply wood filler to fill in any cracks or holes, then sand it smooth.
Lastly, finish with a coat of paint or varnish for protection.
How Do I Fix A Small Hole In A Desk?
To fix a small hole in a desk, start by cleaning the area around the hole. Then, fill the hole with wood filler using a putty knife. After it dries, sand the surface to make it smooth before applying a wood stain or paint to match the desk.
Conclusion
To summarize, fixing a hole in a desk doesn’t have to be a daunting task. By following the step-by-step guide provided in this blog post, you can save money and ensure that your desk remains sturdy for years to come.
Whether it’s using wood filler or patching it up with epoxy, the methods mentioned here are both effective and efficient. So, say goodbye to unsightly holes and hello to a desk that looks good as new!