To make a garden flag, start by selecting the fabric and cutting it to the desired size. Then, hem the edges, add a sleeve at the top for the flagpole, and sew in any decorative elements.
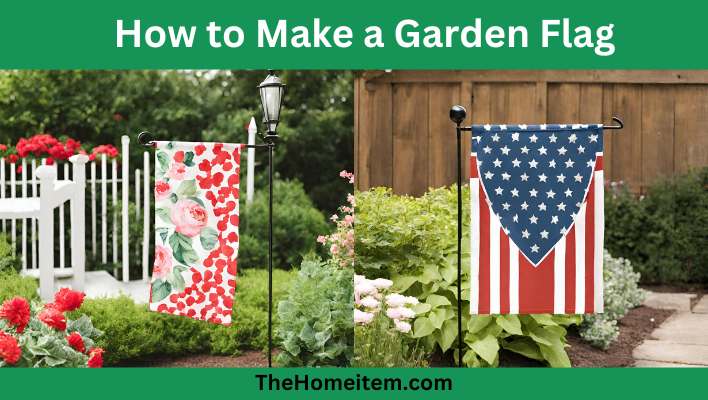
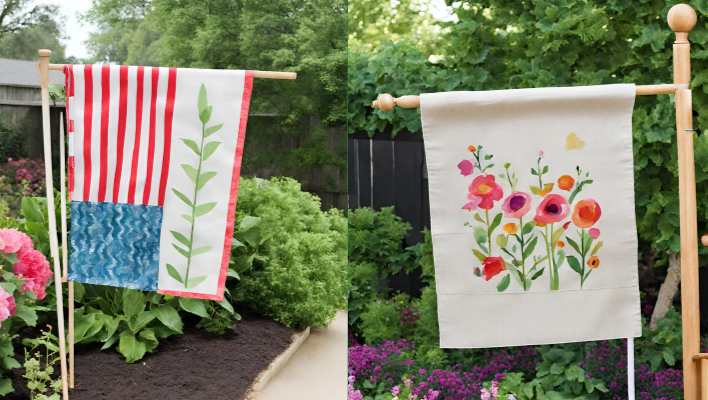
How to Make a Garden Flag – A delightful journey into crafting your outdoor oasis. Ever wondered how a simple piece of fabric could transform your garden into a vibrant haven? In this guide, we’ll explore the art of creating personalized garden flags that not only add a unique touch to your outdoor space but also reflect your style. Ready to infuse your garden with creativity?
In a nutshell, making a garden flag is about weaving your personality into a piece of fabric. From choosing the perfect materials to adding personal touches, the process is a delightful blend of creativity and craftsmanship. Dive into our guide as we unravel the secrets behind crafting garden flags that stand out and make a statement in your outdoor sanctuary.
Table of Contents
Planning And Designing Your Garden Flag
Creating a beautiful garden flag is a great way to add a personal touch to your outdoor space. Before you start the actual process of making your flag, it’s important to spend some time planning and designing it. This step will help ensure that your garden flag turns out exactly how you envision it. In this section, we will discuss four essential aspects of planning and designing your garden flag: choosing a suitable location, determining the size and shape, selecting a design or theme, and gathering the necessary materials.
Choose A Suitable Location For Your Garden Flag
When it comes to choosing a suitable location for your garden flag, you want to make sure that it is easily visible and adds to the overall aesthetics of your garden. Consider placing it in an area that receives enough sunlight to showcase its design. Additionally, think about the backdrop against which your flag will be displayed. A solid colour or a simple background can help emphasize the design of your flag. Take some time to walk around your garden and find the perfect spot that will make your garden flag stand out.
Determine The Size And Shape Of Your Garden Flag
Deciding on the size and shape of your garden flag is an important step in the planning process. The size should be proportionate to the area where it will be displayed. Too large, and it may overwhelm the space; too small, and it might go unnoticed. Consider the vertical space you have available and choose a size that complements your garden’s layout. As for the shape, there are various options to choose from, such as rectangular, square, or triangular. The shape you select should match your personal preference and the style of your garden.
Select A Design Or Theme For Your Garden Flag
Selecting a design or theme is where your creativity comes into play. Think about the overall aesthetic you want to achieve with your garden flag. Are you going for a whimsical and colourful design or a more minimalist and elegant look? Consider the existing elements in your garden, such as flowers or landscaping, and find a design that complements them. You can also choose a theme that reflects your personal interests or the season. Once you have a clear vision in mind, it will be easier to create a garden flag that truly represents your style.
Read Also: Revive Your Garden Sprayer: Expert Tips
Gather The Necessary Materials For Your Garden Flag
Before you start constructing your garden flag, gather all the necessary materials. This includes a durable and weather-resistant fabric, such as nylon or polyester, that can withstand outdoor conditions. You’ll also need fabric paint or markers to create your design, as well as scissors, a sewing machine or needle and thread, and a flagpole or hanger. Take the time to ensure that you have all the supplies you need before you begin, so you can complete your garden flag without any interruptions.
By carefully planning and designing your garden flag, you can create a beautiful and unique addition to your outdoor space. Remember to choose a suitable location, determine the size and shape, select a design or theme, and gather the necessary materials. Once you have everything ready, you’ll be well on your way to making your own eye-catching garden flag that will impress your visitors and bring a touch of personal style to your garden.
Creating Your Garden Flag
Learn how to easily create your garden flag with these simple step-by-step instructions. Enhance your outdoor space and showcase your style with a unique and customized garden flag.

If you’re looking to add a personal touch to your garden, creating your own garden flag is a great way to do it. Not only will it add a pop of colour to your outdoor space, but it will also showcase your creativity and style. Follow these simple steps to make your very own garden flag that will be the envy of your neighbours.
Measure And Cut The Fabric For Your Garden Flag
The first step in creating your garden flag is to measure and cut the fabric. Choose a durable fabric that can withstand outdoor conditions, such as canvas or polyester. Measure the desired size for your flag, typically around 18 inches by 12 inches, and mark the measurements on the fabric. Using sharp fabric scissors, carefully cut along the marked lines to create the flag shape.
Hem The Edges Of The Fabric To Prevent Fraying
To ensure that your garden flag withstands the test of time, it’s important to hem the edges of the fabric. This will prevent fraying and keep your flag looking neat and tidy. Fold over about half an inch of fabric along each edge of the flag and secure it with pins. Using a sewing machine or a needle and thread, sew a straight stitch along the folded edge of the fabric to create a clean hem.
Attach Grommets Or Loops To The Top Edge Of The Flag
Now that your fabric is prepared, it’s time to attach grommets or loops to the top edge of the flag. This will allow you to easily hang your garden flag on a flagpole or any other suitable fixture. Place the grommets or loops evenly along the top edge of the flag, about an inch from each side. Follow the instructions that come with the grommets or loops to secure them in place. If you’re unsure how to attach them, you can also refer to online tutorials or seek assistance from a local crafts store.
Read Also: How to Clean Garden Rocks
Paint Or Print Your Design Onto The Fabric
This is where your creativity comes into play. Decide on a design for your garden flag and use fabric paints or fabric printing techniques to bring your design to life. Whether you opt for a simple pattern, your monogram, or a vibrant scene, make sure to use colors that will stand out and complement your garden. If you’re using fabric paints, follow the instructions on the packaging for application and drying times. If you’re printing your design, ensure that you use fabric-friendly ink and allow it to dry completely before moving on to the next step.
Allow The Paint To Dry Completely Before Proceeding
Before you proudly display your garden flag, it’s crucial to allow the paint to dry completely. This will ensure that your design doesn’t smudge or fade over time. Patience is key here, as some fabric paints may require several hours or even overnight to fully dry. It’s better to wait a little longer than to rush the process and risk ruining your hard work. Once the paint is dry, your garden flag is ready to be hung up and admired by all who pass by.
Now that you know how to create your own garden flag, it’s time to let your creativity run wild. Follow these steps and get ready to showcase your unique style in your outdoor oasis.
Adding Extra Embellishments To Your Garden Flag
Enhancing your garden flag with extra embellishments can add a personal touch and make it truly unique. Whether you want to embroider or applique additional designs, glue or sew on decorative elements, or add lettering or personalized messages, there are various ways to take your garden flag to the next level. Let’s explore these options and learn how to make your garden flag stand out.
Embroider Or Applique Additional Designs Onto The Flag
One way to add extra flair to your garden flag is by embroidering or applying additional designs onto the fabric. Embroidery can create intricate and beautiful designs, while applique adds dimension by layering different fabric pieces. Here’s how you can do it:
- Select a design or pattern that you want to incorporate into your garden flag.
- Using an embroidery hoop, secure the flag fabric tightly.
- Choose thread colours that complement the existing design or fabric colour.
- Embroider the design onto the fabric, following the pattern and using different stitches to create texture and depth.
- If you prefer applique, trace the design onto fabric pieces, cut them out, and then sew or glue them onto the flag.
- Make sure to secure any loose threads or edges for a polished look.
Glue Or Sew On Decorative Elements Such As Buttons Or Ribbons
Another way to add visual interest to your garden flag is by incorporating decorative elements such as buttons, ribbons, or trims. These embellishments can bring pops of colour and texture to your flag. Here’s how you can attach them:
- Choose the decorative elements you want to add to your flag, such as buttons, ribbons, or trims.
- If using buttons, sew them onto the fabric by threading a needle and securing them with small stitches.
- If using ribbons or trims, cut them to the desired length and attach them to the flag with fabric glue or by sewing them along the edges.
- Ensure that the attachments are secure and won’t easily come loose.
- Arrange the decorative elements pleasingly, considering the overall design of your garden flag.
Add Lettering Or Personalized Messages To The Garden Flag
Personalize your garden flag by adding lettering or messages that reflect your personality or convey a special meaning. This can be a great way to celebrate a special occasion, showcase a favourite quote, or simply add a welcoming touch. Follow these steps to incorporate lettering onto your flag:
- Decide on the wording or message you want to include.
- Choose a font style and size that is easily readable and complements the design of your flag.
- If you have excellent handwriting, you can use fabric markers or fabric paint to directly write on the flag.
- Alternatively, you can print out the desired wording or message onto transfer paper and iron it onto the fabric.
- Make sure to position the lettering accurately and secure it with heat or fabric glue.
- Allow the lettering to dry or set according to the instructions provided with the materials.
By embroidering or appliquing additional designs, attaching decorative elements, or adding personalized lettering, you can transform a regular garden flag into a piece of art that reflects your style and creativity.
Attaching Your Garden Flag To A Flagpole Or Stand
So, you’ve just finished making a beautiful garden flag and now it’s time to show it off! Attaching your garden flag to a flagpole or stand is a simple process that ensures your flag will be displayed proudly in your garden. In this section, we will guide you through the steps to securely attach your flag and prevent it from falling or getting blown away.
Insert The Flagpole Or Stand Into The Ground In Your Chosen Location
The first step in attaching your garden flag is to choose a suitable location in your garden and insert the flagpole or stand on the ground. Make sure to choose a spot that allows your flag to be visible and adds a decorative touch to your outdoor space.
Read Also: How to Fix Garden Hose Spray Nozzle: Quick and Easy Solutions
Slide The Grommets Or Loops Of The Flag Onto The Flagpole Or Stand
Once you have positioned your flagpole or stand, it’s time to slide the grommets or loops of your garden flag onto it. Grommets are typically metal rings, while loops are fabric loops sewn directly onto the flag. Both designs serve the same purpose – securing your flag to the flagpole or stand.
To attach your flag, simply slide the grommets or loops over the flagpole or through the loops of the stand. Ensure a snug fit, as this will prevent the flag from slipping off during strong winds or other outdoor conditions.
Secure The Flag In Place To Ensure It Doesn’t Fall Or Get Blown Away
Now that your garden flag is securely attached to the flagpole or stand, it’s important to secure it in place. This will protect your flag from falling or getting blown away, helping it withstand the elements and prolong its lifespan. Here are a few methods you can use to secure your garden flag:
- Use zip ties or cable ties to fasten the flag to the flagpole or stand.
- Wrap a small bungee cord around the flag and secure it to the flagpole or stand.
- Tie the flag using sturdy twine or rope, ensuring it is tightly secured to the pole or stand.
- Consider using flag clips or clamps designed specifically for holding flags in place.
- If using a garden flag stand, make sure the stand has a sturdy base and is secured to the ground to prevent it from tipping over.
By following these steps to securely attach and fasten your garden flag, you can enjoy its beauty and presence in your garden for a long time to come.
Maintaining And Caring For Your Garden Flag

Once you’ve crafted a beautiful garden flag to adorn your outdoor space, it’s important to maintain and care for it properly. Regular cleaning and proper storage can help prolong the life of your flag, ensuring it remains vibrant and vibrant for years to come. Here are some essential tips to help you care for your garden flag:
Regularly Clean Your Garden Flag To Remove Dirt Or Stains
To keep your garden flag looking its best, it’s essential to clean it regularly to remove dirt, dust, and any stains that may accumulate over time. Follow these simple steps:
- Remove the flag from its pole or hanger.
- Gently shake off any loose dirt or debris.
- Prepare a solution of mild detergent and warm water.
- Dip a soft cloth or sponge into the soapy water.
- Gently scrub the flag, paying extra attention to any stained areas.
- Rinse the flag thoroughly with clean water.
- Allow the flag to air dry completely before reattaching it to the pole or hanger.
By regularly cleaning your garden flag, you can keep it looking vibrant and fresh, even after exposure to the elements.
Read Also: How to Build a Garden Gate?
Store Your Garden Flag In A Safe Place During Harsh Weather Conditions
During severe weather conditions such as high winds, heavy rain, or snowstorms, it’s crucial to remove your garden flag from its outdoor display and store it in a safe place. Here are some tips to help you protect your flag:
- Remove the flag from its pole or hanger.
- Inspect the flag for any signs of damage or wear.
- Fold the flag neatly and place it in a waterproof bag or container.
- Store the flag in a cool, dry location away from direct sunlight.
- Ensure the storage area is free from pests or rodents that may cause damage.
- When the weather improves, inspect your flag again before reattaching it to the pole or hanger.
Proper storage during harsh weather conditions can help prevent damage to your garden flag and ensure its longevity.
Replace Worn Out Or Damaged Parts Of The Flag As Needed
Over time, your garden flag may experience normal wear and tear, leading to worn-out or damaged parts. It’s essential to inspect your flag regularly and replace any worn or damaged components. Here’s what you need to do:
- Remove the flag from its pole or hanger.
- Inspect the flag for any signs of fraying, tearing, or fading.
- If necessary, replace the flag fabric with a new one of the same size and design.
- Check the pole or hanger for any signs of rust or weakening.
- If needed, replace the pole or hanger with a new one that fits your flag properly.
- Reattach the flag to the pole or hanger and ensure it is securely fastened.
By replacing worn-out or damaged parts of your garden flag, you can maintain its overall appearance and functionality.
Frequently Asked Questions For How To Make A Garden Flag
Can I Use Any Fabric To Make A Garden Flag?
Yes, you can use a variety of fabrics to make a garden flag. However, it is recommended to choose a durable, weather-resistant fabric like nylon or polyester, which will withstand outdoor conditions and ensure your garden flag lasts longer.
How Can I Attach The Garden Flag To The Pole?
To attach the garden flag to the pole, you can use either a grommet or a sleeve. A grommet allows you to insert the pole through the flag’s hole, while a sleeve slides over the pole. Both methods are effective in securing the garden flag to the pole.
Can I Personalize My Garden Flag?
Absolutely! Personalizing your garden flag adds a unique touch and makes it truly your own. You can use fabric paints, markers, or even iron-on transfers to add your name, monogram, or any design you desire. Let your creativity shine and make your garden flag stand out.
Conclusion
Creating your garden flag is a delightful way to personalize your outdoors Following these simple steps, you can design a flag that reflects your unique style and adds a charming touch to your garden. From choosing the right fabric to selecting the perfect design, this DIY project allows you to showcase your creativity and enjoy the beauty of nature.
So, gather your materials, unleash your imagination, and let your garden flag fly high!
Read Also: