To add a padded seat to a wooden chair, you will need a piece of foam cut to the size of the seat, fabric to cover the foam, a staple gun, and a screwdriver. First, remove the seat from the chair using a screwdriver.
Next, cut a piece of foam to fit the seat and wrap it in fabric. Secure the fabric to the underside of the seat using a staple gun. Finally, reattach the seat to the chair. Now you have a comfortable padded seat on your wooden chair.
Introducing a padded seat to a wooden chair can greatly enhance its comfort and appearance. Whether you want to give an old chair a fresh look or simply make it more cozy, adding a cushioned seat is a practical solution. In this guide, we will provide you with a step-by-step approach to achieving this transformation. You will learn how to measure and cut the foam, choose the fabric, attach it securely, and reinstall the seat. By following these instructions, you can easily create a stylish and comfortable addition to any wooden chair. So let’s get started and give your chair a much-needed upgrade.
Table of Contents
Identify Your Wooden Chair Style
When it comes to adding a padded seat to a wooden chair, one of the first steps is to identify the style of your chair. This will help you determine the most suitable modifications to make. In this section, we will provide a quick evaluation of various wooden chair designs and guide you through the process of determining the style of your chair for the purpose of making appropriate modifications.
Quick Evaluation Of Various Wooden Chair Designs
Wooden chairs come in various designs, each with its own unique characteristics. Here is a quick overview of some commonly found designs:
- 1. Spindle-Back Chairs: Featuring a series of vertical spindles that form the backrest, spindle-back chairs have a classic and timeless look. They are often seen in farmhouse or vintage-style homes.
- 2. Ladder-Back Chairs: These chairs have horizontal slats that mimic the rungs of a ladder, providing comfortable back support. Ladder-back chairs have a rustic and charming appeal, making them popular in country-style or cottage-themed interiors.
- 3. Windsor Chairs: Known for their rounded backs and spindles, Windsor chairs are highly sought-after for their elegance and traditional craftsmanship. They are commonly used in both traditional and contemporary settings.
- 4. Parsons Chairs: With a simple, armless design, Parsons chairs are known for their versatility and ability to blend seamlessly with various interior styles. They are often upholstered for added comfort.
- 5. Bentwood Chairs: These chairs are crafted by bending thin layers of wood to create curved backrests and seats. Bentwood chairs add a touch of sophistication to any space and are commonly found in cafes and restaurants.
Determining The Style Of Your Chair For Suitable Modifications
Determining the style of your wooden chair is essential for identifying the modifications required to add a padded seat. Here’s a step-by-step guide to help you:
- Examine the chair’s overall design: Take a close look at the chair’s shape, backrest, legs, and overall structure. Consider any distinctive features or decorative elements that may indicate its style.
- Research common characteristics: Conduct some research or consult available resources to better understand the typical characteristics of various wooden chair styles. This will enable you to compare the features of your chair and narrow down its style.
- Identify key design elements: Look for specific design elements, such as the shape of the backrest, the type of legs used, or any ornamental details that can help you identify the chair’s style. Take note of these characteristics.
- Compare with reference images: Use online platforms, design magazines, or furniture catalogs to find reference images of different chair styles. Compare these images to your chair, focusing on the key design elements you’ve identified.
- Seek expert advice: If you’re still uncertain about the style of your chair, don’t hesitate to seek advice from furniture experts or professionals who specialize in chair restoration and modification.
By following these steps, you will be able to accurately identify the style of your wooden chair, allowing you to proceed with suitable modifications to add a padded seat. Remember, each chair style may require unique adjustments, so understanding its characteristics is crucial for successful customization.
Now that you have identified your wooden chair style, it’s time to move on to the next step: preparing the chair for adding a padded seat.

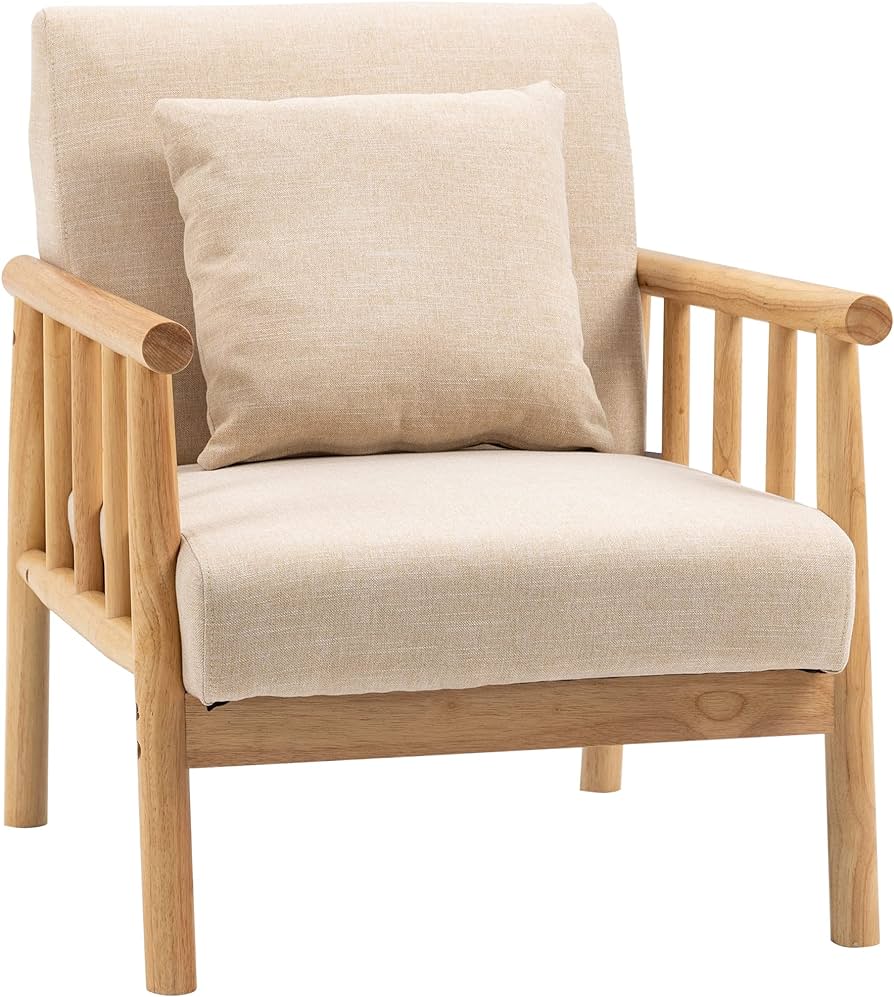
Credit: www.wayfair.com
Gather The Necessary Tools And Materials
Before you embark on the journey of adding a padded seat to your wooden chair, it’s important to gather all the essential tools and materials to ensure a successful revamping process. Having everything you need at your fingertips will save you time and allow you to complete the project smoothly.
Essential Tools Needed For The Revamping Process
To get started, make sure you have the following tools ready:
- Screwdriver: This will come in handy if you need to remove any screws or detach parts of the chair.
- Staple gun: This tool is essential for securing the fabric onto the chair’s seat.
- Scissors: You’ll need a good pair of scissors to cut the foam, fabric, and any other materials to the desired size.
- Measuring tape: Accurate measurements are crucial for a neat and well-fitted padded seat. Use a measuring tape to measure the dimensions of your chair’s seat.
- Ruler: A ruler can be helpful for marking and ensuring straight lines during the cutting and stapling process.
- Power drill: If your chair requires additional screws or fasteners, a power drill will make the job easier.
Required Materials For Creating A Padded Seat
To create a comfortable and visually appealing padded seat, gather the following materials:
- Foam: You’ll need foam padding to provide the cushioning for your seat. Choose a density and thickness that suits your comfort preferences.
- Fabric: Select a durable and aesthetically pleasing fabric that complements your chair and the overall style of your room.
- Plywood or MDF board: Depending on the condition of your chair’s seat, you may need to replace it with a sturdy plywood or MDF board as the base for the padding.
- Batting: Adding a layer of batting between the foam and fabric will help create a smoother and softer finish.
- Staples: Use staples to secure the fabric, foam, and batting in place.
- Wood glue or adhesive: If you need to attach the plywood or MDF board to the chair’s seat, a reliable wood glue or adhesive will do the trick.
- Sanding paper: Smooth out any rough edges or imperfections on the wooden chair before applying the new padding.
With these tools and materials ready, you’re well-equipped to transform your plain wooden chair into a comfortable seating masterpiece with a padded seat.
Prepare Your Wooden Chair For Modification
Before you can add a padded seat to your wooden chair, it’s important to prepare the chair for the modification. This involves cleaning the chair to remove any dust and debris, as well as assessing the stability of the chair and making any necessary repairs. By taking these steps, you can ensure that your wooden chair is in the best condition possible before adding the padded seat.
Cleaning The Chair To Remove Dust And Debris
The first step in preparing your wooden chair for modification is to clean it thoroughly. Dust and debris can accumulate on the chair’s surface over time, so it’s important to remove these particles before making any modifications. Here are the steps you can follow to clean your wooden chair:
- Start by using a soft cloth or brush to gently wipe down the chair, removing any loose dust or dirt.
- Next, mix a mild detergent with warm water in a bowl or bucket.
- Dip the cloth or brush into the soapy water and wring out any excess liquid.
- Gently scrub the chair, paying special attention to any areas with stubborn stains or grime.
- Once you’ve cleaned the entire chair, rinse the cloth or brush and dip it in clean water.
- Wipe down the chair again, this time using the clean water to remove any soap residue.
- Finally, use a dry cloth to remove any excess water and allow the chair to air dry completely before proceeding with the modification.
Assessing The Stability Of The Chair And Making Necessary Repairs
After cleaning the chair, it’s important to assess its stability and make any necessary repairs. This is crucial to ensure that the chair can support the additional weight of a padded seat and provide a safe and comfortable seating experience. Here are the steps you can follow to assess and repair your wooden chair:
- Begin by carefully inspecting the chair for any visible signs of damage, such as loose joints, cracks, or splintered wood.
- If you notice any structural issues, use a screwdriver or hammer to tighten loose joints or screws.
- If the chair has any cracks or splintered wood, you can use wood glue to repair these areas. Apply the glue to the damaged area and press the wood together firmly, then use clamps to hold it in place until the glue dries.
- Alternatively, if the damage is extensive, you may need to replace certain parts of the chair, such as the legs or backrest. In this case, you can consult a professional or refer to online tutorials for guidance.
- Once you have addressed any structural issues and made any necessary repairs, it’s essential to test the chair’s stability by sitting on it and applying a gentle pressure. If the chair feels secure and stable, it is ready for the next step in the modification process.
By cleaning the chair to remove dust and debris and assessing the stability of the chair while making necessary repairs, you can ensure that your wooden chair is in optimal condition for adding a padded seat. These preliminary steps will help create a solid foundation for a comfortable and durable seating solution.
Crafting The Padded Seat
Adding a padded seat to a wooden chair is a great way to enhance its comfort and style. Whether you have an old chair that needs a bit of a makeover or you simply want to add a personal touch to a new piece, this step-by-step guide will help you create a comfortable and customized seat. In this section, we will walk you through the process of measuring and cutting the foam for the seat, selecting the right fabric for the upholstery, and attaching the foam and fabric to the chair. Let’s get started!
Measuring And Cutting The Foam For The Seat
Before you can begin upholstering your wooden chair, you’ll need to measure and cut the foam for the seat. Here’s how:
- Start by measuring the length and width of the chair seat. Using a measuring tape, carefully measure from one side of the seat to the other, and then from the front edge to the back. Write down these measurements.
- Next, choose the thickness of the foam you want to use. Thicker foam will provide more cushioning, while thinner foam will give a firmer seat. Take this into consideration when selecting your foam.
- Using your measurements, mark the foam with a pen or pencil and cut along the lines using a sharp utility knife. Take your time and make sure to cut straight and evenly.
Selecting The Right Fabric For The Upholstery
Once you have your foam cut to size, it’s time to select the right fabric for the upholstery. Here are some tips to help you make the best choice:
- Consider the style and color scheme of the room where the chair will be placed. Choose a fabric that complements the existing décor.
- Take into account the durability and cleaning requirements of the fabric. If the chair will be used frequently or in a high-traffic area, opt for a durable and easy-to-clean fabric.
- Decide on a pattern or texture that matches your personal preference. Whether you prefer a solid color, a floral print, or a textured fabric, there are endless possibilities to choose from.
Step-by-step Guide To Attaching The Foam And Fabric To The Chair
Now that you have your foam and fabric ready, it’s time to attach them to the wooden chair. Follow these steps:
- Place the foam on top of the chair seat and secure it in place with a layer of adhesive spray. Make sure the foam is centered and aligned with the edges of the seat.
- Smooth out any wrinkles or bubbles in the fabric and place it over the foam, making sure it covers the entire seat. Leave some excess fabric around the edges to ensure a snug fit.
- Starting from one side, pull the fabric tightly over the foam and staple it to the underside of the chair seat using a staple gun. Repeat this process on the opposite side, pulling the fabric tightly and stapling it in place.
- Continue stapling the fabric along the remaining sides, alternating between opposite sides to maintain an even and neat appearance. Trim any excess fabric if necessary.
Congratulations! You have successfully crafted a padded seat for your wooden chair. With these simple steps, you can transform any chair into a comfortable and stylish piece of furniture. Enjoy your newly upholstered seat!
Adding The Finishing Touches
Learn how to add a padded seat to a wooden chair and give it a professionally finished look. This simple guide will help you transform your chair into a comfortable and stylish piece of furniture.
Once you have successfully padded the seat of your wooden chair, it’s time to add the finishing touches. These final touches not only enhance the overall look of the padded seat but also contribute to the comfort and stability of the chair. In this section, we will explore some optional decorative elements as well as seat cushions or ties that you can install to elevate the aesthetic appeal and functionality of your wooden chair.Optional Decorative Elements To Enhance The Look Of The Padded Seat
To give your wooden chair a distinctive and personalized touch, you can consider incorporating optional decorative elements. These elements can range from simple additions to more intricate designs, depending on your preference and skill level. Here are a few ideas to inspire you:- Buttons or tufting: Adding buttons or tufting to your padded seat creates an elegant and classic look. You can use contrasting upholstery thread to make the buttons stand out, or choose a matching color for a more cohesive appearance.
- Contrasting piping or welt cord: Piping or welt cord is a decorative trim that can be attached along the edges of the padded seat. It adds definition and accentuates the shape of the chair. Opt for a contrasting color to create a striking effect.
- Embroidery or appliqué: If you have nimble fingers and a creative flair, consider adding embroidery or appliqué elements to your padded seat. Whether it’s a delicate floral pattern or a bold geometric design, these details can give your chair a unique and personalized touch.
- Patterned or textured fabric: Choosing a fabric with an interesting pattern or texture can instantly elevate the visual appeal of your padded seat. From floral prints to geometric motifs, there are endless possibilities to explore.
Installing Seat Cushions Or Ties For Added Comfort And Stability
While a padded seat alone provides a significant improvement in comfort, you can further enhance it by installing seat cushions or ties. These additions not only provide additional support but also help to secure the padded seat firmly onto the chair. Here are the steps to install seat cushions or ties:- Measure and cut the foam: Using the dimensions of your wooden chair seat, measure and cut a piece of foam padding to fit snugly on top.
- Attach the foam: Place the cut foam over the padded seat, ensuring it aligns properly. You can use a spray adhesive to secure the foam in place.
- Add fabric ties: To prevent the padded seat from sliding or shifting, you can attach fabric ties at the back corners. Sew these ties onto the underside of the padded seat, and then securely fasten them around the chair frame.
- Secure the cushion: If you prefer a removable cushion, you can add hook-and-loop fasteners or fabric ties to the bottom of the padded seat, allowing you to easily attach and detach the cushion as needed.
Frequently Asked Questions On How To Add A Padded Seat To A Wooden Chair
How Do You Put Padding On A Wooden Chair?
To add padding to a wooden chair, follow these steps: 1. Measure and cut foam or padding to fit the seat area. 2. Attach the padding using strong adhesive or upholsterer’s staples. 3. Cover the padding with a fabric of your choice and secure it with a staple gun or adhesive.
How Can I Make My Wooden Chair More Comfortable?
To make a wooden chair more comfortable, add a cushion or padding to the seat. You can also consider adding lumbar support or armrest cushions. Adjusting the chair’s height and adding a footrest can enhance comfort too.
What To Use For Padding When Reupholstering A Chair?
Use high-density foam or cotton batting for padding when reupholstering a chair.
How Can I Add Padding To A Wooden Chair Seat?
To add padding to a wooden chair seat, start by measuring the seat dimensions. Then, cut foam padding to fit the seat size, and attach it securely with adhesive. Finally, cover the padding with fabric, securing it tightly to the underside of the seat using a staple gun.
Conclusion
Revamp your wooden chair with a comfortable and stylish padded seat in just a few simple steps. Adding a padded seat not only enhances the overall aesthetic of your chair, but also provides additional comfort. With our easy-to-follow guide, you can transform any wooden chair into a cozy seating option that is both functional and visually pleasing.
Get ready to enjoy extended hours of comfort while adding an elegant touch to your home decor. Say goodbye to uncomfortable wooden chairs and hello to relaxation and style!