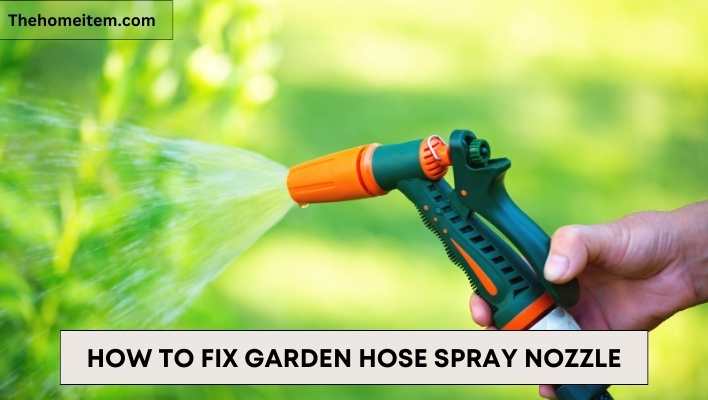
To fix a garden hose spray nozzle, first check for any clogs or debris in the nozzle openings, then clean or replace the nozzle accordingly. A well-maintained garden hose spray nozzle is essential for effective watering and gardening tasks.
With regular use, nozzles can become clogged or damaged, resulting in reduced water flow or uneven spray patterns. In this guide, we will discuss simple steps to fix a garden hose spray nozzle, helping you get back to your gardening tasks with ease.
Whether you have a basic spray nozzle or a more advanced one with various settings, these tips will help you troubleshoot and resolve common issues. By following these steps, you can ensure your nozzle works effectively and efficiently, providing you with the perfect spray for your outdoor needs.
Table of Contents
Common Garden Hose Spray Nozzle Issues
Having a well-functioning garden hose spray nozzle is essential for maintaining a healthy garden. However, like any other tool, a spray nozzle can experience issues over time. In this article, we will explore three common problems that garden hose spray nozzles often face: leaking from the sprayer head, clogging or reduced water flow, and broken or damaged spray patterns. By understanding these issues and learning how to fix them, you can ensure that your garden hose spray nozzle delivers optimal performance.
Leaking from the Sprayer Head
One of the most frustrating issues with a garden hose spray nozzle is when it starts to leak from the sprayer head. Not only does this waste water, but it can also make it difficult to achieve the desired water pressure for efficient garden watering. To fix this problem, follow these simple steps:
- Check for any visible cracks or damage on the sprayer head. If you notice any, it may be time to replace the nozzle.
- Tighten the connection between the spray nozzle and the hose. Use a wrench if necessary, making sure not to overtighten, as this can cause further damage.
- If the leakage persists, try replacing the washer inside the sprayer head. Sometimes, a worn-out or faulty washer can cause leaks.
- Finally, consider using a thread seal tape to create a tight seal between the spray nozzle and the hose connection. This can help prevent leaks in the future.
Clogging or Reduced Water Flow
Another common issue that garden hose spray nozzles face is clogging or reduced water flow. When the nozzle becomes clogged, it can disrupt the water flow and make it difficult to effectively water your garden. Here are a few simple steps to fix this problem:
- Remove the nozzle from the hose and check for any visible debris or sediment. Clean them using a soft brush or toothbrush.
- If the nozzle has removable parts, disassemble it and soak the components in a mixture of water and vinegar. This will help dissolve any built-up mineral deposits or grime.
- Rinse the components thoroughly, ensuring that all traces of vinegar and debris are removed.
- Reassemble the spray nozzle, making sure that all parts fit snugly. If any parts are damaged or worn, consider replacing them with new ones.
Broken or Damaged Spray Patterns
A garden hose spray nozzle with broken or damaged spray patterns can make it challenging to water your plants evenly. Whether it’s a misshapen spray pattern or water spraying in unexpected directions, fixing this issue is crucial. Follow these steps to restore the spray patterns:
- Inspect the nozzle for any visible obstructions or damage. Remove any debris or sediment that may be blocking the spray holes.
- If the spray patterns are still not satisfactory, consider adjusting the nozzle settings. Most garden hose spray nozzles offer options for different spray patterns, such as mist, shower, or jet. Experiment with the settings until you achieve the desired spray pattern.
- If adjusting the settings doesn’t solve the problem, disassemble the nozzle and soak the components in a mixture of water and mild detergent. This will help remove any stubborn residue that may affect the spray patterns.
- Rinse the components thoroughly and reassemble the spray nozzle.
By addressing these common garden hose spray nozzle issues, you can save both time and frustration while maintaining a healthy and vibrant garden. Regular maintenance and troubleshooting will ensure that your spray nozzle continues to perform optimally, allowing you to enjoy the full benefits of your garden hose.
How To Fix Leaking From The Sprayer Head
If you’ve noticed that your garden hose spray nozzle is leaking from the sprayer head, there are a few steps you can take to quickly resolve the issue. By inspecting and replacing the washer and o-ring, tightening loose connections, and applying thread seal tape, you can easily fix the problem and get back to watering your plants without any leaks.
Inspecting the Washer and O-Ring
The first thing you’ll want to do is inspect the washer and o-ring inside the sprayer head. Over time, these components can become worn or damaged, leading to leaks. Follow these steps to inspect the washer and o-ring:
- Twist the sprayer head counterclockwise to remove it from the hose.
- Locate the washer and o-ring inside the sprayer head.
- Inspect the washer and o-ring for any cracks, tears, or wear and tear.
Replacing the Washer and O-Ring
If you find that the washer or o-ring is damaged, it’s important to replace them. Here’s how you can do it:
- Purchase a replacement washer and o-ring from your local hardware store.
- Remove the old washer and o-ring from the sprayer head.
- Slide the new washer and o-ring onto the sprayer head.
- Twist the sprayer head back onto the hose, ensuring a snug fit.
Tightening Loose Connections
Loose connections can also cause leaks from the sprayer head. To fix this issue, follow these steps:
- Check for any loose connections between the sprayer head and the hose.
- Using pliers, tighten any loose connections to ensure a secure fit.
- Test the sprayer head for leaks by turning on the water.
Applying Thread Seal Tape
If you’re still experiencing leaks after inspecting and replacing the washer, o-ring, and tightening connections, applying thread seal tape can help create a watertight seal. Simply follow these steps:
- Wrap thread seal tape around the threads on the hose where the sprayer head attaches.
- Ensure that the tape is wrapped tightly and evenly.
- Twist the sprayer head back onto the hose, making sure it is securely tightened.
- Turn on the water and check for any remaining leaks.
By following these steps, you should be able to fix any leaking issues from the sprayer head of your garden hose spray nozzle. Remember to thoroughly inspect and replace any damaged components, tighten loose connections, and apply thread seal tape if necessary. With these simple fixes, you’ll have a leak-free sprayer head and can enjoy watering your garden hassle-free.
How To Fix Clogging Or Reduced Water Flow
Is your garden hose spray nozzle experiencing clogging or reduced water flow? Don’t fret! We have some simple solutions for you to try. The first step in fixing this issue is removing any dirt and debris that may have accumulated in the nozzle.
To do this, unscrew the nozzle from the hose and inspect it for any visible dirt or debris. You can use a soft brush or toothbrush to gently scrub away any build-up. Alternatively, you can rinse the nozzle under running water to flush out any particles that may be causing the problem.
Cleaning the Nozzle Holes with a Needle
If removing dirt and debris doesn’t solve the issue, the next step is to clean the nozzle holes using a needle. Sometimes, mineral deposits or small particles can get lodged in these tiny openings, causing reduced water flow.
Take a thin needle and carefully insert it into each nozzle hole. Gently wiggle the needle back and forth to dislodge any obstructions. Be careful not to force the needle too hard, as this could damage the nozzle.
Soaking the Nozzle in Vinegar Solution
In some cases, the reduced water flow may be caused by mineral deposits that are difficult to remove with a needle. To tackle this issue, you can try soaking the nozzle in a vinegar solution.
Mix equal parts of vinegar and water in a bowl or bucket. Submerge the nozzle in the solution and let it soak for about 30 minutes. The acidic properties of vinegar will help break down and dissolve any mineral build-up.
Using a High-Pressure Hose Nozzle Attachment
If all else fails, you may need to consider using a high-pressure hose nozzle attachment. These attachments are designed to increase water pressure and provide a more powerful spray.
To use a high-pressure hose nozzle attachment, simply attach it to the end of your garden hose. You can then adjust the settings to control the water flow and pressure.
By following these simple steps, you can easily fix clogging or reduced water flow in your garden hose spray nozzle. Remember to regularly inspect and clean your nozzle to prevent future issues. Now you can enjoy a strong and steady spray for all your gardening needs!
How To Fix Broken Or Damaged Spray Patterns
When your garden hose spray nozzle is not delivering the steady and precise spray pattern that it used to, it can be frustrating and hinder your gardening efforts. Fortunately, there are a few simple steps you can take to fix the issue and restore the functionality of your nozzle. In this section, we will discuss the three main methods to fix broken or damaged spray patterns: checking for blockage in the spray head, adjusting the nozzle settings, and replacing the spray head or adjusting the internal parts.
Checking for Blockage in the Spray Head
If your spray pattern is inconsistent or weak, the first thing you should check is whether there is any blockage in the spray head. Over time, debris such as dirt, sediment, or small stones can accumulate and clog the nozzle openings, affecting the spray pattern. To check for blockage, follow these steps:
- Turn off the water flow and disconnect the hose from the water source.
- Remove the spray head from the hose.
- Inspect the spray head for any visible debris or blockage.
- If there is any visible debris, use a small brush or toothpick to gently clean the nozzle openings.
- Once you have removed the blockage, reattach the spray head to the hose.
Adjusting the Nozzle Settings
If you have checked for blockage and found none, the issue may be with the nozzle settings. The spray pattern can be adjusted by rotating the nozzle or changing the spray mode. Follow these steps to adjust the nozzle settings:
- Hold the spray head firmly and rotate it to the desired spray pattern. Common patterns include a wide-angle spray, a concentrated jet, or a gentle mist.
- If your nozzle has multiple spray modes, switch to a different mode to see if it improves the spray pattern.
- Test the spray pattern by turning on the water flow and observing the results. Repeat the process until you find the desired pattern.
Replacing the Spray Head or Adjusting the Internal Parts
If the above methods do not improve the spray pattern, it may be necessary to replace the spray head or adjust the internal parts. Here are the steps to do so:
- Turn off the water flow and disconnect the hose from the water source.
- Depending on your hose nozzle model, either unscrew the spray head from the hose or remove the retaining clip.
- If you are replacing the spray head, simply attach the new one to the hose. If you are adjusting the internal parts, carefully disassemble the spray head and follow the manufacturer’s instructions for adjusting or replacing the necessary components.
- Reassemble the spray head or attach the new one securely to the hose.
- Test the spray pattern by turning on the water flow. If needed, further adjust the settings until you achieve the desired pattern.
In some cases, using a universal spray nozzle repair kit can be an effective solution. These kits typically include replacement parts and instructions for fixing common issues with garden hose spray nozzles. If you choose to use a repair kit, be sure to follow the manufacturer’s instructions carefully for the best results.
By following these steps, you can easily fix broken or damaged spray patterns on your garden hose spray nozzle. Whether it’s a simple blockage or a more complex internal issue, taking the time to troubleshoot and repair your nozzle will ensure optimal and hassle-free gardening experience.
Preventive Maintenance Tips For Garden Hose Spray Nozzles
Garden hose spray nozzles are essential tools for watering plants, cleaning outdoor surfaces, and maintaining your garden. However, just like any other tool, they require regular maintenance to ensure they function properly and last longer. By following these preventive maintenance tips, you can keep your garden hose spray nozzle in excellent condition and avoid common issues that may arise.
Regularly Cleaning and Inspecting the Nozzle
Regular cleaning and inspection of your garden hose spray nozzle are vital to prevent clogging and ensure optimal performance. Over time, dirt, debris, and mineral deposits can accumulate in the nozzle, hindering the water flow and resulting in a weak spray pattern.
To clean the nozzle, follow these steps:
- Detach the nozzle from the hose.
- Use a small brush or toothbrush to remove any debris or dirt from the nozzle holes.
- Soak the nozzle in a solution of warm water and mild detergent to dissolve any stubborn residue.
- Rinse the nozzle thoroughly with clean water.
- Inspect the nozzle for any signs of damage, such as cracks or loose parts.
- Ensure that all the holes are clear and free from obstructions.
By cleaning and inspecting your garden hose spray nozzle regularly, you can maintain its functionality and identify any issues before they worsen.
Storing the Nozzle Properly
Proper storage of your garden hose spray nozzle is crucial to prevent damage and prolong its lifespan. Exposure to extreme weather conditions, such as sunlight, heat, or freezing temperatures, can deteriorate the nozzle’s materials and affect its performance.
Follow these tips to store your nozzle correctly:
- Detach the nozzle from the hose and let it dry thoroughly before storage.
- Store the nozzle in a cool, dry place, away from direct sunlight and extreme temperatures.
- Consider using a nozzle hanger or a hook to keep it off the ground and prevent any accidental damage.
- Protect the nozzle from dust and debris by covering it with a cloth or a nozzle cover.
By storing your garden hose spray nozzle properly, you can maintain its quality and ensure it is ready for use whenever needed.
Using a Nozzle with Metal Construction
Opting for a garden hose spray nozzle with metal construction is a wise choice for long-term usability and durability. Metal nozzles are not only resistant to corrosion but also less prone to cracking or breaking compared to their plastic counterparts.
When selecting a metal nozzle, consider the following:
- Choose a nozzle made of durable and rust-resistant materials, such as brass or stainless steel.
- Check the nozzle’s construction for solid, sturdy connections to minimize the risk of leaks or breakages.
- Look for adjustable spray patterns and flow control features to cater to your specific watering needs.
By using a garden hose spray nozzle with a sturdy metal construction, you can ensure its longevity and enjoy efficient watering sessions without worrying about frequent replacements.
Avoiding Excessive Water Pressure
Excessive water pressure can not only damage your garden hose spray nozzle but also strain your hose and potentially cause leaks. It is essential to use the nozzle at the recommended pressure and avoid subjecting it to unnecessary stress.
Here’s how you can prevent excessive water pressure:
- Check the manufacturer’s guidelines or nozzle instructions for the recommended water pressure range.
- Install a pressure regulator or a control valve to regulate water flow and maintain consistent pressure.
- Start with a low-pressure setting and gradually increase it until you achieve the desired spray pattern.
By avoiding excessive water pressure, you can protect your garden hose spray nozzle and ensure its efficient functioning for a longer duration.
Frequently Asked Questions Of How To Fix Garden Hose Spray Nozzle
How Do You Fix A Garden Hose Spray Nozzle Handle?
To fix a garden hose spray nozzle handle, follow these steps: 1. Disconnect the nozzle from the hose. 2. Inspect the handle for any cracks or damage. 3. If the handle is damaged, replace it with a new one. 4.
Attach the new handle to the nozzle by screwing it on tightly. 5. Reconnect the nozzle to the hose and test it for proper function.
How Do You Fix A Leaky Spray Nozzle?
To fix a leaky spray nozzle, first, turn off the water supply. Then, remove the nozzle from the hose or wand. Check for any clogs or debris and clean them out if necessary. Inspect the rubber washer and replace it if cracked or worn.
Reassemble the nozzle and test for leaks.
How Do You Unclog A Garden Sprayer?
To unclog a garden sprayer, follow these steps: 1. Disconnect the sprayer from the power source. 2. Remove the nozzle and clean it thoroughly. 3. Clear any debris from the filter, hose, and tank. 4. Use a hose or pipe cleaner to dislodge clogs.
5. Reassemble the sprayer and test it before using it.
How Do You Adjust The Nozzle On A Garden Sprayer?
To adjust the nozzle on a garden sprayer, twist it clockwise or counterclockwise until you achieve the desired spray pattern.
Conclusion
Fixing a garden hose spray nozzle is a relatively simple process that can save you money and frustration in the long run. By following the steps outlined in this blog post, you can easily troubleshoot and repair common issues with your spray nozzle.
Remember to check for clogs, leaks, and damaged parts, and make sure to use lubricant to keep your nozzle functioning smoothly. With a little bit of time and effort, you’ll have your garden hose spray nozzle working like new again.
Don’t let a malfunctioning nozzle get in the way of your gardening adventures!