To make a garden gnome, gather clay, shape it into a gnome figure, let it dry, and then paint it with colorful and weather-resistant paint. Creating your own garden gnome adds a fun and whimsical touch to your outdoor space.
Whether you’re an experienced sculptor or a beginner looking for a creative project, making a garden gnome allows you to express your imagination and personality. Using clay as the primary material, you can shape and mold it into a gnome figure, providing you with plenty of opportunities to customize its appearance.
Once you’ve achieved the desired shape, you must let the clay dry thoroughly to ensure its durability. Finally, applying weather-resistant paint not only adds color and vibrancy to your garden gnome but also protects it from the elements. So, let’s go ahead and dive into the steps of making a delightful garden gnome that will bring a touch of enchantment to your outdoor space.
Table of Contents
Collecting The Materials
Before you can start creating your own charming garden gnome, you’ll need to gather all the necessary materials. From clay to brushes, here’s everything you need to know about selecting the right materials for your gnome-making journey.
Choosing The Right Type Of Clay
The first step in creating your garden gnome masterpiece is selecting the perfect type of clay. There are several options available, each with its own characteristics and suitability for sculpting. For a durable and weather-resistant gnome, polymer clay is an excellent choice. This type of clay is easy to work with and can be baked to set the final shape. Alternatively, you can opt for air-dry clay, which eliminates the need for baking but may require more time to fully cure. Whichever clay you choose, make sure it is of high quality and suitable for sculpting intricate details and textures.
Finding The Ideal Tools For Sculpting
To bring your garden gnome to life, you’ll need the right tools for sculpting. Invest in a set of sculpting tools that includes various shapes and sizes, such as wire loops, ball styluses, and carving knives. These tools will help you shape the clay, add fine details, and smooth out any imperfections. Additionally, a rolling pin or clay roller will be handy for flattening the clay and creating a smooth surface for sculpting. Remember to keep these tools clean and well-maintained for optimal performance.
Selecting Appropriate Paint And Brushes
Once your garden gnome is sculpted and dry, it’s time to bring it to life with vibrant colors. Selecting the right paint and brushes is crucial for achieving a professional and lasting finish. Acrylic paints are a popular choice for gnome painting due to their versatility and fast drying time. Look for paints that are specifically formulated for outdoor use, ensuring they are weather-resistant and won’t fade in sunlight. When it comes to brushes, opt for synthetic bristle brushes with different sizes to accommodate various areas of your gnome’s features and clothing. A fine brush will help you add intricate details, while a larger brush will be useful for painting larger areas more quickly.
Gathering Any Additional Materials Needed
In addition to clay, sculpting tools, and paint, there may be other materials you’ll need to create your garden gnome. Consider any specific accessories, such as small props, hats, or accessories, that you want to include in your gnome’s design. These can be made from a variety of materials like plastic, fabric, or wood. Furthermore, gather any adhesives or sealants that may be necessary to attach these additional elements or protect your gnome from the elements. By ensuring you have all the necessary additional materials in advance, you can avoid interruptions during the creative process and enjoy a seamless gnome-making experience.
Designing Your Garden Gnome
Designing your own garden gnome can be a fun and creative project that allows you to add a personal touch to your outdoor space. Whether you want your gnome to be whimsical and charming or sleek and modern, the design process is where you can bring your vision to life. By sketching out your gnome’s appearance, deciding on their pose or action, and planning any additional features or accessories, you can create a one-of-a-kind gnome that reflects your style and adds character to your garden.
Sketching Out Your Gnome’s Appearance
Before you start crafting your garden gnome, it’s important to have a clear idea of how you want it to look. One way to achieve this is by sketching out your gnome’s appearance on paper. This will help you visualize the overall design, including the gnome’s body shape, facial features, and clothing. Consider factors such as the gnome’s size, proportion, and facial expressions. You can even add some unique details like a hat, beard, or accessories to make your gnome stand out. By using your sketch as a reference, you’ll have a blueprint to follow while bringing your gnome to life.
Deciding On The Gnome’s Pose Or Action
The pose or action of your gnome can give it a distinctive personality and make it more interesting. Think about what you want your gnome to convey – whether they’re waving hello, gardening, or sitting peacefully. Consider the gnome’s posture, hand gestures, and body position to create a sense of movement or stillness. Remember, the pose should be in line with the gnome’s overall theme and style. Whether you want a gnome that exudes energy or one that adds a calming presence to your garden, choosing the right pose is essential for bringing your gnome to life.
Planning Any Additional Features Or Accessories
In addition to the gnome’s appearance and pose, you can enhance its charm by planning for additional features or accessories. These elements can help tell a story or add uniqueness to your gnome. Consider adding accessories like a shovel, watering can, or a tiny wheelbarrow to show their purpose in the garden. You could also think about incorporating natural elements like moss or stones to create a more organic feel. As you plan these additional features, ensure they complement the overall design and do not overwhelm the gnome’s appearance. The key is to strike a balance between simplicity and creativity.
Sculpting The Gnome
Learn the art of making a garden gnome with our step-by-step guide. Discover the secrets of sculpting and bring your own whimsical creation to life.
Preparing The Clay For Sculpting
When it comes to sculpting a garden gnome, the first step is to prepare the clay for your masterpiece. Start by selecting a suitable type of clay, such as water-based or polymer clay, that is easy to mold and shape. Ensure that the clay is soft and pliable before you begin. If needed, you can add a few drops of water to moisten it or knead it with your hands to soften it up. Remember to work on a clean and smooth surface to prevent any debris from getting into your clay.
Building The Basic Structure Of The Gnome
The next step in sculpting your garden gnome is to build the basic structure. Start by forming a ball of clay that will serve as the gnome’s body. Use your hands to shape it into a slightly elongated form, making sure it is proportional and symmetrical. Place the body on the work surface and gently press it down to create a stable base. This will help keep your gnome standing upright once it’s finished.
Adding Details And Defining The Features
Now that the basic structure is in place, it’s time to add some personality to your gnome. Begin by shaping the head of your gnome, making it slightly smaller than the body. Attach it securely to the body and use your fingers to smooth out any visible seams. Once the head is in place, you can start creating the facial features. Use a small tool or your fingers to carve out the eyes, nose, and mouth, ensuring that they are well-defined and proportionate. Don’t forget to form the ears as well, giving your gnome a whimsical touch.
Smoothing And Refining The Surfaces
After adding the details, it’s essential to smooth and refine the surfaces of your gnome. Use a damp cloth or sponge to gently rub over the clay, smoothing out any rough edges or imperfections. This will give your gnome a polished and professional look. Pay attention to the transitions between different parts of the gnome, such as the neck and body, making sure they blend seamlessly. Take your time with this step, as it will greatly enhance the overall appearance of your sculpture.
Remember, sculpting a garden gnome requires patience and attention to detail. Take your time and enjoy the process of bringing your gnome to life. With practice, you’ll be able to create more intricate and unique gnomes that will add charm to your garden. So, get your clay, roll up your sleeves, and let your creativity shine!
Painting And Finishing Touches
Once you have crafted your adorable garden gnome, it’s time to bring it to life with vibrant colors and intricate details. The painting and finishing touches are where your gnome truly comes to life, showcasing your creativity and adding a personal touch to your garden. Follow these steps to ensure your gnome stands out and delights all who see it.
Priming The Gnome Before Painting
Before starting to paint your garden gnome, it’s essential to prime the surface. This step prepares the gnome for better paint adhesion and helps the colors appear more vibrant. To prime your gnome, gently sand any rough areas or imperfections on its surface using fine-grit sandpaper. Once sanded, wipe away any dust or debris using a damp cloth. Apply a thin layer of primer evenly over the gnome using a brush or spray. Allow the primer to fully dry before moving on to the next step.
Applying Base Coats And Adding Colors
Now that your gnome is primed and ready, it’s time to apply the base coats and add colors. Choose a color for the gnome’s body and apply a smooth, even layer using a brush or sponge. Allow the base coat to dry completely before applying additional colors. To add stripes, dots, or other designs to your gnome, use painter’s tape or stencils to create crisp lines. Mix and match colors that complement each other to create a visually appealing and lively gnome.
Adding Shading And Highlights For Depth
To give your garden gnome depth and dimension, you’ll want to add shading and highlights. Choose a slightly darker shade of the base color and apply it to the areas that would naturally have shadows. Use a small brush or sponge to blend the shading seamlessly. Next, select a lighter shade and apply it to the raised parts or areas that catch light. This technique adds depth and realism to your gnome, making it more visually appealing.
Decorating With Intricate Details
Now comes the fun part – adding intricate details to your garden gnome. Use a fine-tipped brush to paint facial features, such as eyes, nose, and mouth. Take your time to ensure precision and accuracy. You can also add details like rosy cheeks, freckles, or even tiny accessories like a hat or flower. Let your imagination run wild as you bring your gnome’s personality to life through fine details.
Sealing And Protecting The Finished Gnome
After all your hard work, it’s important to seal and protect your finished gnome to ensure its longevity. Apply a clear outdoor sealant to protect the paint from fading, chipping, or weather damage. This step will also make your gnome easier to clean if it gets dirty over time. Follow the manufacturer’s instructions for the sealant, allowing it to dry completely before placing the gnome in your garden.
With the painting and finishing touches complete, your garden gnome transforms into a captivating addition to your outdoor space. Let your creativity shine through and enjoy the compliments on your unique and beautifully painted gnome.
Placing Your Garden Gnome
Discover the secrets of making your own garden gnome with these simple steps. From choosing the right materials to adding personal touches, this guide will help you create a charming addition to your outdoor space.
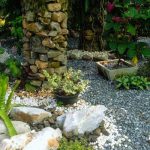
The placement of your garden gnome plays a crucial role in accentuating the charm and character of your outdoor space. By strategically positioning your gnome, you can create a delightful focal point that complements your plants and flowers. In this section, we will explore how to choose the right spot in your garden, how to arrange the gnome among plants and flowers, and how to add additional decorations or accents for a whimsical touch.
Choosing The Right Spot In Your Garden
When selecting the ideal location for your garden gnome, consider the following factors to ensure its visibility and aesthetics:
1. Visibility: Choose an area in your garden where the gnome can be easily seen and appreciated. Avoid hiding it behind taller plants or structures, as the gnome should be a prominent feature.
2. Natural Surroundings: Take into account the natural surroundings of your garden. Look for a spot that complements the overall theme and style of your outdoor space. For example, if you have a rustic garden, consider placing the gnome near a weathered wooden fence or amongst natural stone features.
3. Sunlight: Gnomes thrive in sunlight, just like your plants. Ensure that the chosen spot receives ample sunlight throughout the day to make your gnome bask in its warm glow.
4. Proximity to seating area: If you have a seating area in your garden, consider positioning your gnome within view of it. This way, you and your guests can enjoy the whimsical sight of the gnome while relaxing or entertaining outdoors.
Arranging The Gnome Among Plants And Flowers
Once you have chosen the perfect spot in your garden, it’s time to create an enchanting arrangement by placing your gnome among plants and flowers. Consider the following tips for an aesthetically pleasing display:
1. Height and Proportion: Arrange plants and flowers of varying heights around the gnome to create visual interest. For example, tall flowers like sunflowers or hollyhocks can be placed behind the gnome, while shorter ones like pansies or daisies can be positioned in the front.
2. Color coordination: Choose plants and flowers that complement the colors of your gnome. For example, if your gnome has a red hat, consider planting flowers in hues of red, pink, or purple to create a harmonious color scheme.
3. Incorporate foliage: Intersperse your arrangement with green foliage plants to provide a lush backdrop for the gnome. The combination of flowers and foliage will create a balanced and vibrant display.
4. Grouping: Consider grouping similar plants or flowers together to create clusters around the gnome. This will draw attention to the gnome and create a visually pleasing composition.
Adding Additional Decorations Or Accents
To further enhance the charm of your gnome, you can add additional decorations or accents to the surrounding area. Here are a few ideas:
1. Fairy lights: Wrap delicate fairy lights around nearby plants or structures to create a magical atmosphere around your gnome, particularly during evenings or special occasions.
2. Miniature garden accessories: Consider incorporating miniature garden accessories such as tiny benches, birdhouses, or birdbaths. These charming additions will complement your gnome and add a touch of whimsy to your garden.
3. Pathway or stepping stones: Create a pathway or place stepping stones leading up to the gnome. This will not only guide the eye towards the gnome but also invite visitors to explore your enchanting garden.
Remember, the key to a captivating garden gnome arrangement is creating a harmonious blend of visual elements, textures, and colors. By carefully placing your gnome, arranging it among plants and flowers, and adding thoughtful accents, you’ll transform your garden into a delightful haven that radiates whimsy and charm.
Frequently Asked Questions For How To Make A Garden Gnome
How Do You Make A Garden Gnome?
To make a garden gnome, you will need clay or concrete, a gnome mold, and paint. First, fill the mold with your chosen material and let it dry. Once dry, remove the gnome from the mold and paint it with the desired colors.
Let the paint dry, and your garden gnome is ready to add some charm to your garden.
What Materials Are Needed To Make A Garden Gnome?
To make a garden gnome, you will need clay or concrete, a gnome mold, and paint. These materials will allow you to create a sturdy and visually appealing gnome. Clay or concrete ensures the gnome’s durability, while paint adds character and color to your creation.
Can Garden Gnomes Withstand Outdoor Weather?
Yes, garden gnomes are designed to withstand outdoor weather conditions. Most garden gnomes are made from materials like clay or concrete, which are sturdy and durable. These materials are resistant to rain, sun exposure, and other weather elements, making them suitable for outdoor use.
However, it’s a good idea to check the specific care instructions for your gnome to ensure its longevity.
Conclusion
Creating your own garden gnome can be a fun and creative project that adds a touch of charm to your outdoor space. By following the steps outlined in this blog post, you can embark on a journey of crafting a unique gnome that reflects your personal style and adds a whimsical element to your garden.
So gather your supplies, unleash your creativity, and get ready to bring your very own garden gnome to life!